Monthly Archives: May 2014

Garden Fresh Lentil Soup

Yesterday I wrote about how excited I was to find fresh veg to harvest after our vacation. To recap, I harvested a zucchini, one pound of purple potatoes, some celery, 4 carrots, and even pulled up an onion (not very big yet, but it was starting to bulge out!).

photo 3

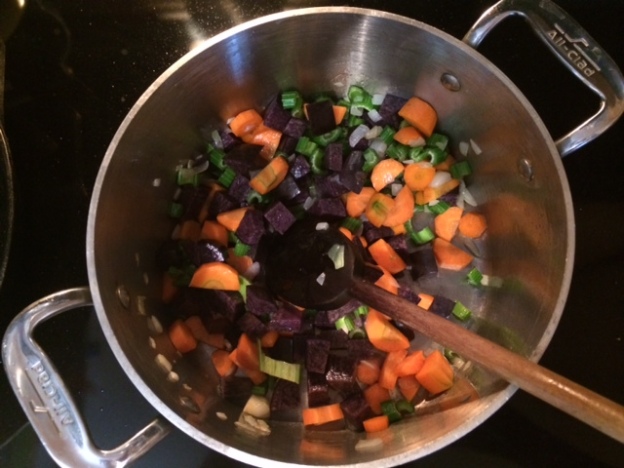
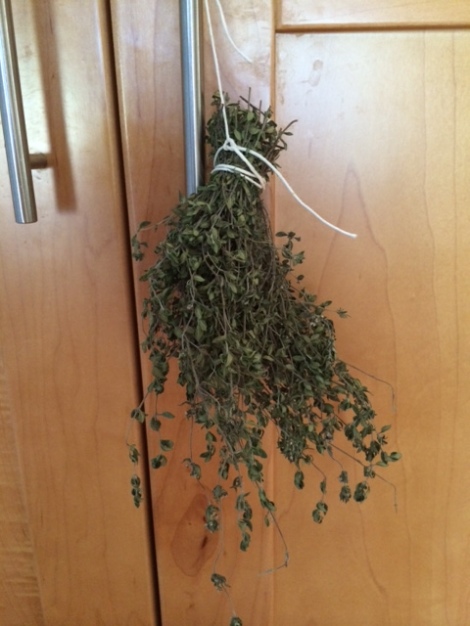
I had a package of Trader Joe’s steamed lentils in the fridge so I decided to make lentil soup. I had 10 minutes to do it before needing to pick up my big kid at preschool. That gave me just enough time to get the soup started before heading out. Making this soup is incredibly easy. Just chop your onion and sauté over medium heat with some olive oil. You can add some chopped garlic here too. I didn’t because I didn’t have any, but I would have. Then add chopped celery. Then carrots and potatoes. Now add enough water to cover all the veg. Next dice up the zucchini and throw it in too. Add a few pinches of dried thyme (maybe you have some dried from your garden!). Then just break up the pre-steamed lentils into the soup pot and bring to a boil. When it starts boiling, reduce heat to low and let it simmer for 20 minutes or so (until the carrots and potatoes are cooked through but not mushy). I didn’t add any salt to this soup because I planned to feed it to baby girl for lunch. Instead I just seasoned it at the table. Really, there are no rules to lentil soup. Just use whatever fresh veg you have at your disposal. It’s great and hearty enough for lunch. Maybe with some crusty bread (or English Muffins?). We had ours with a strawberry, boysenberry and kale smoothie.

photo 1

When food is fresh from the garden, it really doesn’t need much to be delicious. Baby girl ate her bowl all up like I had never seen her eat before. I guess she missed mama’s homemade food while we were on vacation.

I wonder what will be ready to harvest next!

Returning home after vacation


Image

We were lucky enough to spend the last week in Maui. Beautiful beautiful Maui. Even though vacation has taken on a new meaning since our kiddos were born, it was such a treat to get away from our usual responsibilities and enjoy some family time in a gorgeous place.

We went on a glass bottom boat tour. The little man really loved seeing the scuba divers come to the glass with star fish, sea urchins and coral for us to get a closer look.

ImageWe also had a chance to visit the Maui Ocean Center (the aquarium). Little man was obsessed. He got to see lots of fish, sea turtles, sharks, sting rays, and more.

ImageAnd of course we had plenty of time to play at the beach and at the pool too. But alas and alack, all vacations must come to an end. Our flight arrived late last night. At 10:30pm. By the time we picked up our luggage and got home it was 11:15 pm and by the time we got the littles to bed it was 11:45pm. Ouf! You’d think we would have immediately collapsed into bed ourselves, but we hadn’t had a chance to eat much dinner on a plane. At that hour, we wouldn’t have found much open and really didn’t want to go out again anyway.  Our fridge was pretty bare when we left. I even took the opportunity to clean it since it was already so empty!

ImageHmm…some jam, miso paste, beer, whole wheat flour, champagne, and….eggs! I made sure to keep our eggs unwashed before we left so they were fresh and ready to eat upon our return. I had also made a big batch of english muffins a few days before our trip and froze them. So hubby and I enjoyed a late night snack of fresh eggs and homemade english muffins. Not too bad for scrounging.

Image


I was a little worried about what I was going to feed my kids today, though (you know, other than eggs and english muffins). I didn’t love the idea of having to rush to the grocery store but as you can see our fridge was pretty empty. I must have been jet-lagged because it wasn’t until I went out to feed the chickens this morning that I realized I had lots of vegetables to harvest in my garden! How convenient! So, before getting the littles up, I was able to harvest one zucchini, one pound of purple potatoes, some celery, 4 carrots, and even a few blackberries! Here’s what our fridge looks like now.

ImagePlenty to make a healthy lunch today. And with the split quarter of grass fed beef in our freezer, I will be able to get a great dinner out of what we already have at home too. After eating out for over a week, getting some healthy, homemade food back on our plates is what I’m really craving. Here’s to home!

Maintaining a sourdough starter

photo 2

A few months ago I was lucky enough to procure a sourdough starter from a friend. I’ve attempted to make a sourdough starter from scratch before using wild yeast from the air and while my starter definitely got bubbly, the smell was funky and unappealing. I probably just needed to keep at it, but the bread I made with it didn’t rise and I quickly lost motivation to keep feeding it.

When my friend told me she had sourdough starter to share, I was thrilled. This time, though, I wanted to make sure to maintain it properly. She pointed me to the website Viva La Focaccia to read up on sourdough starters. I also like The Fresh Loaf for more sourdough starter information, recipes and tips.

The sourdough starter I received was 100% All-Purpose (AP) flour. From my reading, I learned that if you want to make whole wheat (WW) bread, you should use a whole wheat starter. So after refreshing my AP starter, I used the extra and started converting some of it to a WW starter (and kept some of it . Basically, I mixed AP and WW flour to refresh the starter and increased the amount of WW flour each time I refreshed it over a few days until I reached 100% WW flour. That method seems to have worked, because I’ve been successfully using the WW starter for over a month now to make WW Sourdough English Muffins.

photo 3

Since I need my starter to be low maintenance right now and don’t have time to make bread daily, I keep it in the fridge and refresh every week or two. When I need to refresh it or before I want to make bread, I take it out along with my kitchen scale. Refreshing a starter only requires some old starter, flour and water.

photo 4

The amounts you want to use are 50 g starter, 50 g flour and 40 g water. If you want to refresh more (or less) starter, just use equal weight flour and 80% of that weight in water. Refreshing is very easy. Just mix all the ingredients together (I like to mix with my hand), wash the container you use to store the starter and put it back in the fridge. To simplify my life the next time I refresh, I like to weigh out 50g of starter and only store that in the fridge. I usually use the extra to make English muffins. We go through a lot of english muffins in our house, so they’re the only thing I have been making on a weekly basis.

photo 5

Basic food preservation- drying herbs

Image

One of the very easiest ways to start saving food that you’ve grown is to dry herbs. In my garden herbs are prolific. I have oregano, thyme, basil, parsley, rosemary, lemon balm, mint, lemon verbena, tarragon. Of those, I’ve found that the easiest ones to dry for safe keeping are oregano, thyme and rosemary because they’re already fairly dry herbs to begin with and their leaves are small. 

The process for these herbs is extremely simple. Just cut what you want to dry, tie the stems together at the bottom and hang them upside down for a week or two until they’re completely dry and brittle. Then remove the leaves from the stem and store in a clean, dry jar. What could be easier? 

Image

A few weeks ago, my thyme and oregano were taking over one of my raised beds in the front yard. I needed to make some room for other things to go in but of course would hate for all those herbs to go to waste. So I dried them and replenished my supply from last summer. So simple. And I use oregano daily in my cooking, so it’s a good thing it grows so well here. 

Image

For basil, your best bet is to cut the leaves in half and dry with a food dehydrator on a very low heat setting. Basil leaves are just so moist that they take a long time to dry and do better with a little extra help from the dehydrator. I haven’t tried parsley but I imagine it would be the same. 


Happy preserving!

A simple sewing project- suck pads for a soft structure baby carrier

If we are friends in real life, it’s no secret to you that I have a bit of an obsession with baby carriers. I mostly use woven wraps these days, but I also love love love my Tulas (yes, I have several…mama’s gotta have options!). Similar in concept to the Ergo baby carrier, the Tula is a full buckle carrier. It has more padding than an Ergo, though, and the straps synch tighter to make it more adjustable. Basically, it’s more comfortable and comes in all sorts of fun fabrics. I’m not knocking the Ergo. It was a fabulous carrier until my first baby was about 18 months. At that point, we really needed something more supportive. I bought a toddler-sized Tula and was hooked. Now I’m a Tula girl through and through. Well…in addition to my wraps. Those are a whole different story. 

My newest Tula is called Eiko Quilt. The middle panel features this pretty fabric. 

Image


Seeing as my baby girl loves nothing more than to chew on her Tula straps, those bad boys needed protecting. And since I have barely touched my sewing machine since I found out I was pregnant with baby girl, I needed a simple project to wet my feet again. Suck pads were perfect for that. 

I picked up some Eiko Quilt fabric from Fabric Worm in addition to a coordinating fabric- Eiko Flower Dots. I made the suck pads about 10 x 6.5 inches, although 9 x 6.5 inches would have been fine too. I made them reversible using the two fabrics linked above and included a layer of flannel in the center to add a bit of absorbency. You know. For all that drool. Three coordinating snaps to close them up and they were done. They took about 45 minutes from start to finish, and that was while chatting with my dear blogger friend over at Born Ambitious. Born Imaginative. 

Here’s the finished product. Next time, I might add some ribbon for her to chew on!

Image

ImageImage

Starting over

Staring at this blank blog feels a bit overwhelming and at the same time freeing. I’m coming from a blog with years of history, readers, and time invested. It’s bittersweet to leave it but for privacy reasons I’ve decided to start from scratch. The internet is such a huge and open place. It may be naive of me to believe that I can have a presence here and yet remain somewhat private. But I’m going to try. Don’t be surprised if I transfer some relevant posts from the old blog. I’ve gotten used to referencing it as I cook, sew, garden. Over time, hopefully this place will start to feel like home in the same way.

I’m signing off for now, but excited to start sharing my adventures in gardening, sewing, slow food preparation, with a side of mommyhood very soon.