Category Archives: Soup

Garden Fresh Lentil Soup

Yesterday I wrote about how excited I was to find fresh veg to harvest after our vacation. To recap, I harvested a zucchini, one pound of purple potatoes, some celery, 4 carrots, and even pulled up an onion (not very big yet, but it was starting to bulge out!).

photo 3

I had a package of Trader Joe’s steamed lentils in the fridge so I decided to make lentil soup. I had 10 minutes to do it before needing to pick up my big kid at preschool. That gave me just enough time to get the soup started before heading out. Making this soup is incredibly easy. Just chop your onion and sauté over medium heat with some olive oil. You can add some chopped garlic here too. I didn’t because I didn’t have any, but I would have. Then add chopped celery. Then carrots and potatoes. Now add enough water to cover all the veg. Next dice up the zucchini and throw it in too. Add a few pinches of dried thyme (maybe you have some dried from your garden!). Then just break up the pre-steamed lentils into the soup pot and bring to a boil. When it starts boiling, reduce heat to low and let it simmer for 20 minutes or so (until the carrots and potatoes are cooked through but not mushy). I didn’t add any salt to this soup because I planned to feed it to baby girl for lunch. Instead I just seasoned it at the table. Really, there are no rules to lentil soup. Just use whatever fresh veg you have at your disposal. It’s great and hearty enough for lunch. Maybe with some crusty bread (or English Muffins?). We had ours with a strawberry, boysenberry and kale smoothie.

photo 1

When food is fresh from the garden, it really doesn’t need much to be delicious. Baby girl ate her bowl all up like I had never seen her eat before. I guess she missed mama’s homemade food while we were on vacation.

I wonder what will be ready to harvest next!

Moong Dhal

Even though I grew up learning to cook (and eat!) French food, I like to mix things up every now and then. Indian food is one of my favorite cuisines, so I’ve learned how to make a few simple Indian dishes. Moong Dhal is a staple of my limited repertoire of Indian recipes. I originally looked up lots of recipes online and adapted mine based on the balance of spices I prefer. My dhal is probably not as authentic as it could be, but it’s tasty.
Moong Dhal:
     Ingredients:
2 cups moong dhal (yellow lentils)
1 Tbsp Turmeric
2 Tbsp ghee or vegetable oil
1 medium red onion, diced
4 cloves garlic, finely chopped
2 tsp mustard seeds
2 tsp whole cumin seeds
1 tsp ground cumin
1 chili pepper, finely chopped (I like to use fresh thai chilis if I have them. This time, I used dried thai chilis, and only 1, because the little guy was going to be eating it. Normally I would make it spicier)
8-10 whole curry leaves (I get them at the Indian grocery store and keep them in my freezer)
3 large tomatoes, diced
Salt to taste
Cilantro, chopped, for garnish
     Directions:
1. Wash the dhal in a large bowl several times until the wash water is clear. Cover in water and soak for 20-30 minutes. Drain the water. Put the washed and soaked dhal in a large, heavy-bottomed pot, and cover with 4 cups of water. Bring to a boil and then reduce to a simmer. Cover with lid most of the way and simmer for 20 minutes, until the lentils are soft.
2. While the dhal is cooking, prep the remaining ingredients. Dice the onion and chop the garlic. Heat a heavy-bottomed pan over medium heat. Melt the ghee/vegetable oil. Cook the onions until they begin to be translucent, stirring often. Next add the mustard seeds, cumin seeds, ground cumin, chili pepper and curry leaves. Then add the garlic and cook for about a minute. Don’t let the garlic burn! The cumin and mustard seeds should start to pop. Remove from heat.
3. Stir the turmeric into the cooked lentils. Next add the onion and spices from the previous step into the lentils. Stir well.
4. Stir the tomatoes in and cook for a few minutes. Add salt to taste.
5. Serve with naan bread, chapati or rice, and garnish with cilantro.
The most recent version of dhal and homemade chapati (recipe and instructions here) were a hit in our house, little man included.

Coconut Lemongrass Soup with Tofu


I realize that many of my blog posts begin something like: “So I was at the farmer’s market the other day, and found some amazing _____, which inspired me to make ______.” But what’s a girl to do? The farmer’s market is my inspiration, so it’s only fair that my dishes be based on my local finds.

This post is no different. One of my very favorite vendors at the San Pedro Square market on Fridays in downtown San Jose has a variety of Asian vegetables and herbs. I almost always have to pick up some Chinese eggplant, which is a longer, less spongy version of eggplant. I love the eggplant cut into long slices, brushed with olive oil, salt, pepper and herbs, and grilled. Last Friday though, I went for some stalks of lemongrass. I’d been craving coconut lemongrass soup with Thai flavors, and was determined to make some.

I was going for Thai flavors, similar to Tom Kha Gai. But since I’d never made this before, I did a little research online, and based my recipe off of this site and this one. The soup I came up with is not a traditional Tom Kha Gai, because there are no Kaffir lime leaves, or galangal, but I did get a nice lemongrass coconut flavor, which was exactly what I was looking for. Even with the warm weather we’ve been having, this was a very satisfying meal.

Ingredients:
1 Tbsp coconut oil
2 Carrots, cut into julienne
2 Anaheim bell peppers, thinly sliced
1/2 lb white mushrooms, thinly sliced
1 head broccoli, cleaned and cut into florets
3 cloves garlic, chopped
3 cups chicken or vegetable broth
2 cans coconut milk
2 Serrano or Thai chili peppers, thinly sliced
2 stalk lemongrass, cut into 2-inch pieces and crushed
6 slices ginger
zest from 2 limes
1 Tbsp brown sugar
2 Tbsp fish sauce
1 package firm tofu, cut into 1/2-inch cubes
juice from 2 limes
cayenne pepper (optional, to taste)
1 cup cilantro, coarsely chopped (for garnish)

Directions:

  • Heat the coconut oil in a medium saucepan. Add carrots, and saute for 3 minutes. Turn heat to low, and add garlic. Saute for 1 minute.
  • Pour in broth and coconut milk. Stir in ginger, lemongrass, chili peppers, lime zest, brown sugar, fish sauce and Anaheim bell peppers. Simmer soup for 15 minutes.
  • Add tofu & mushroom slices and lime juice to soup and continue to simmer for 5-10 minutes.
  • Add broccoli and cook for another 5 minutes.
  • At this point, taste the soup to decide if it has enough heat for you. I used Serrano chilies (would have preferred Thai chilies), and the soup was not spicy enough for my taste. So I added about 1/8-1/4 tsp of cayenne pepper. Make sure to only add a tiny bit at a time, and retaste. You can always add more spice, but you can’t take any away, so be careful!
  • Garnish with cilantro just before serving. Enjoy!

Paleo Meal


Before I jump into the foodie aspect of this dinner, let me preface with a little bit of background information. I learned about the Paleo Diet earlier this year from a friend and neighbor, Richard, who has experienced impressive weight loss and fitness success by revamping the way he thinks about food and eating. Richard writes a blog about his paleo lifestyle at http://freetheanimal.com/, which includes a nice balance of information from recently published research & position papers and personal experience in the form of recipes, progress photos, and emails from friends and family who’ve also experienced positive results.

For a complete overview of what paleo eating entails you really should check out Richard’s blog (nice overviews here & here), but I will do my best to give you a quick rundown. The basic premise is that, in the grand scheme of evolution, the amount of time that we’ve been agricultural people is about 2 seconds (approximation mine). This means that for the majority of human history, our ancestors have been hunters and gatherers. Things like grains, vegetable oils and processed sugars haven’t been available to us, and therefore we are not as well adapted to eating them. A paleo meal (also called “primitive”) usually consists of meat, vegetables, and some fruit (mostly fruits that would typically be gathered, like berries).

I know this sounds a lot like Atkins, but the focus is on eating real, unprocessed food, without counting carbs (or counting anything, for that matter). I find this all very interesting, especially given Richard’s results, and those of our good friends Kevin & Joseph after going paleo.

Recently, Richard has given me several flattering plugs on Free the Animal. Apparently, I’ve inspired him to focus more on food presentation and photography on his “food porn” posts (and his hard work is paying off, because the food looks great!). We decided to get together for dinner after our trip to France, and I knew that I wanted to cook Richard and his wife Bea a paleo dinner so that I’d be able to feature Free the Animal here.

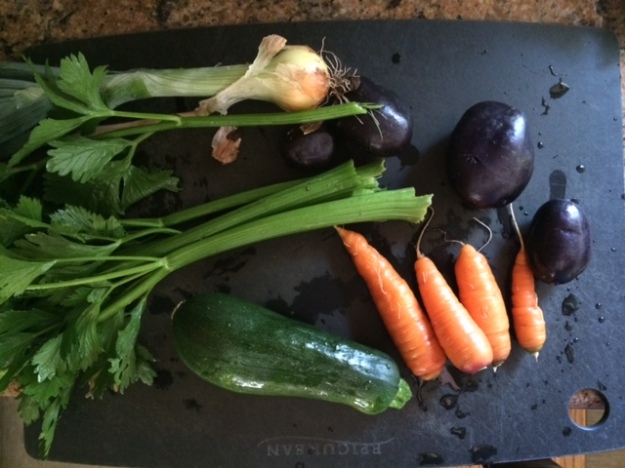
Deciding on a menu took all week and a bit of research. I changed my mind several times, including the day before our dinner, when the beef I’d planned on making didn’t look as enticing as a beautiful fillet of halibut. But that’s how I decide what’s for dinner- pick what looks good at the farmer’s market/grocery store that day- so I’m used to last minute changes. Here’s what I ended up deciding on:

Chilled Tomato Soup with Basil-Infused Oil
~
Broiled Halibut Fillet with Parsley Lemon Butter
served with Pipérade
~
Paleo Raspberry Tart with Raw Whipped Cream

I was pleased with the results, and guessing from the reaction I received from Richard, Bea & Trevor, so were they. Below I’ll break down each component of the menu and provide recipes for your viewing (and perhaps testing/tasting pleasure).

Parsley Lemon Butter


Ingredients:
2 pints heavy whipping cream
3 tbsp creme fraiche
2 tsp cheese salt (optional)
1 cup parsley (washed & packed)
2-3 tbsp lemon juice
zest from 1 lemon

Directions:

  • For the cultured butter: Pour the cream into a clean, earthenware bowl. Add the creme fraiche and gently mix with a clean whisk. Allow the cream to sit overnight in a warm room (about 75 degrees). The next morning, the cream should have thickened slightly. Pour it into the bowl of an electric mixer, fitted with a whisk attachment. Turn the mixer on low and allow the cream to mix until the solids (butter) separate from the liquids (buttermilk). (I didn’t take any pictures of this part, but I’ll make more butter soon and post pictures). Pour the buttermilk into a jar and save it for another use. Add ice water into the bowl with the butter and turn the mixer back on low. Pour out the water (don’t save this time, just dump it out), and continue to “wash the butter” until the water runs clear. Once the water is clear, use the back of a wooden spoon to mix the butter by hand, trying to press out as much water as possible. Pour excess water out of the bowl. If you want to salt the butter, add the cheese salt now and mix it in. Congratulations! You’ve made butter!
  • Keep about half of the butter you’ve prepared for a different use. Put the other half in the bowl of a food processor (if you want to skip the whole “make your own butter step,” soften 1 cup of butter and use it as your base for parsley lemon butter).
  • Add the parsley and lemon zest to the butter. Turn the food processor on. While it’s running, add lemon juice in 1/2 tbsp increments. I recommend stopping the food processor a few times as you’re adding lemon juice to taste the butter. You may like more or less acid.
  • Transfer the parsley lemon butter to small ramekins, cover with wax paper and store in the refrigerator until you’re ready to use it. About an hour before you serve the butter, take it out of the fridge to soften.
Chilled Tomato Soup with Basil-Infused Oil

Part 1: Basil Oil


Ingredients:
2 cups basil (washed & packed)
1 cup olive oil

Directions:

  • In a small pot, bring a few cups of water to boil. Toss basil into the boiling water for 15-30 seconds to blanch.
  • Remove basil and pat dry with a paper towel. Coarsely chop basil.
  • Place basil and olive oil in a food processor.
  • Run food processor until basil is chopped and mixed with olive oil (this doesn’t take long, maybe 10-20 seconds).
  • Transfer oil to a small pot and heat over low heat for about 5 minutes.
  • Remove from stove and allow to cool for about an hour.
  • Place a piece of cheesecloth over a strainer. Strain basil leaves from oil and transfer resulting basil-infused oil to a jar or condiment bottle for storage.
  • Store oil in refrigerator until ready for needed.

Part 2: Chilled Tomato Soup (recipe from Alice Waters: Vegetables…one of my very favorite cookbooks!)


Ingredients:
4 pounds ripe tomatoes
2 tbsp salt
1 small cucumber (peeled, seeded and finely chopped)
2 stalks celery (finely chopped)
3 shallots (finely chopped)
White wine vinegar (I used red wine vinegar)

Directions:

  • Cut the tomatoes into quarters and toss with salt. Allow to sit and soften for about 30 minutes. While the tomatoes are softening, cover the shallots in vinegar and set aside.
  • Once soft, mash the tomatoes with the back of a wooden spoon. Pass the tomatoes through a food mill to remove tomato skins (I used the largest setting of my food mill). You should obtain a thick tomato juice.
  • Stir diced shallots, cucumber and celery into tomato juice. Add salt and vinegar to taste.
  • Chill in the refrigerator until ready to serve.
  • Now for my variation: Just before serving, top soup with basil-infused oil and a little sprig of basil.
Broiled Fillet of Halibut with Parsley Lemon Butter, served with Pipérade
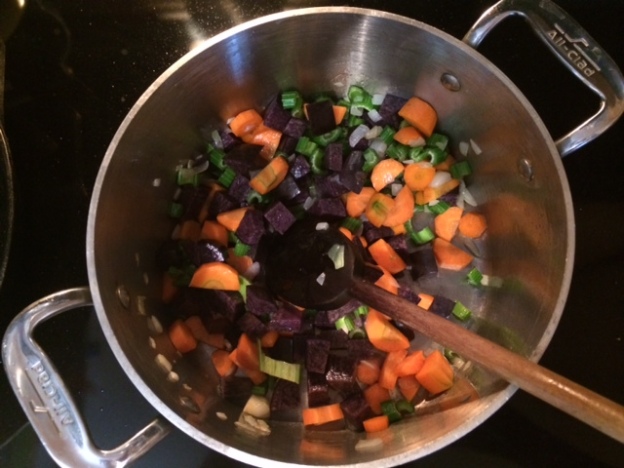

Part 1: Pipérade

Ingredients:
1 yellow onion (chopped)
2 green bell peppers (seeded, halved and sliced)
1 red bell pepper (seeded, halved and sliced)
1 orange bell pepper (seeded, halved and sliced)
6-8 sliced prosciutto (coarsely chopped)
8 medium tomatoes (peeled, seeded and coarsely diced)
Butter & Olive oil for pan
Salt, pepper and herbes de provence, to taste

Directions:

  • Heat a medium dutch oven over medium-low heat. Add prosciutto and cook for 2-3 minutes, until lightly browned. Remove prosciutto and set aside. Melt butter and/or olive oil. Add onions and slowly cook for 8-10 minutes.
  • Add bell peppers and seasoning. Allow to slowly cook for another 10-15 minutes.
  • Add tomatoes and cook for 5 minutes.
  • Just before serving, put prosciutto back into pipérade.
  • Serve alongside halibut. Leftovers are wonderful and are traditionally served with an egg or two, sunny side up.

Part 2: Broiled Fillet of Halibut with Parsley Lemon Butter

Ingredients:
1 fillet of halibut
parsley lemon butter
1 shallot (finely chopped)
1/2 cup fresh parsley (coarsely chopped)
Juice from 1 lemon
Salt & pepper to taste
Basil oil (or olive oil) to grease pan

Directions:

  • Place tin foil on a large rimmed cookie sheet. Grease foil with basil oil (or olive oil).
  • Carefully rinse and pat dry the halibut fillet. Place the fillet on the greased baking sheet.
  • Place pats of parsley lemon butter on top of halibut. Sprinkle with salt, pepper, lemon juice, shallots and parsley.
  • Turn your oven’s broiler on the low setting and place the halibut in the top 1/3 of the oven (no need to preheat, the broiler becomes hot fast).
  • Broil the halibut for about 15 minutes (more or less depending on the size of the fillet…mine was about 2.5 pounds).
  • Remove from oven and serve with parsley lemon butter and pipérade.

Paleo Raspberry Tart with Raw Whipped Cream


Ingredients:
For paleo pastry crust:
3/4 cup dates (pitted and coarsely chopped)
3/4 cup coconut flour
3/4 cup almond meal
1 stick cold butter, diced
1/4 cup very cold water

For paleo raspberry jam (no sugar!):
12 oz frozen, unsweetened raspberries
1/4 cup honey
7-8 lemon seeds

For topping:
Raspberries
Raw cream

Directions:

  • For paleo pastry tart: Preheat oven to 375 degrees. Add first 4 ingredients to the bowl of a food processor. Turn food processor on and slowly pour in cold water. The dough should come together, although it will be nearly impossible to roll out. Instead press the dough into a buttered tart pan. Bake in preheated oven for 15 minutes (but I recommend checking after 10 minutes, because the almond meal will have a tendency to burn if it bakes too long). Allow the crust to cool completely before using.
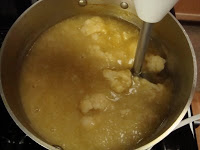
  • For paleo jam: Cut a small square of cheesecloth and a small piece of kitchen twine. In the center of the cheesecloth, place your lemon seeds. Then use the kitchen twine to tie the cheesecloth into a small bundle.* In a small pot, add the raspberries, honey and lemon seed bundle. Cook over medium-low heat for 15-20 minutes. You can test whether the jam is starting to come together by spooning a small amount onto a clean plate. The jam should move slowly when the plate is tipped to one side or the other. If you prefer less seeds in your jam, pass the jam through a food mill on the medium setting. Allow the jam to cool completely before using.
  • For the topping: Top crust with an even layer of raspberry jam. Then top with raspberries. If desired, whip up some homemade whipped cream in a stand mixer fitted with a whisk attachment, to make for a more decadent dessert. I used raw cream to keep the meal the least processed possible.

* Wondering what the lemon seeds are for? Lemons and apples are “high pectin” fruits and can be used when making jam to add a little natural fruit pectin boost. These methods have been used for jam-making for many years, in the days before you could buy nifty little boxes of pectin from the grocery store. For more info check here, or google it!

Chilled Coconut Carrot Soup


This summer soup was inspired by a recipe from Bea at La Tartine Gourmande, one of my favorite food bloggers. She originally made a “Coriander-flavored Carrot Mash with Coconut Milk”, which I adapted into this soup.

Ingredients:

6-7 large carrots, peeled and largely chopped
2 tsp green curry paste
1/2 cup light coconut milk
4 tsp creme fraiche
Salt to taste
Chives for garnish

Directions:

  • Fill a medium-sized soup pot halfway with water. Add the green curry paste and carrots. Cook the carrots over medium heat, until they are very soft.
  • Pour out most of the water from the pot, but keep about 1 cup of the cooking water with the carrots.
  • Use an immersion blender to puree the carrots until they reach a smooth consistency.
  • In order to reach an even smoother consistency, now pass the carrot puree through a food mill, at the finest setting.
  • Mix the coconut milk into the carrot puree. Add salt to taste and chill the soup in the refrigerator until cold.
  • Just before serving, garnish each bowl with a dollop of creme fraiche and a few sprigs of chives.

Creamy Roasted Parsnip Soup


I’m a big fan of roasted root vegetables. They’re something I look forward to about cold weather. I mean, you really can’t roast vegetables in a hot oven when it’s 95 degrees outside, and 80 degrees inside. So I make sure to get my fill during the winter months. Even though it’s not technically winter anymore, the weather can’t seem to make up its mind. The last week has been pretty cold here!

Recently, I experimented with a new root vegetable (new to me at least)- parsnips! I don’t think parsnips are particularly obscure root vegetables. I may have eaten them before…I just don’t recall ever cooking with them myself. In a spirit of experimentation, I decided to order them with our CSA box last week to find out what the parsnip is all about. Turns out, it’s quite tasty! Roasting them brought out a nice sweetness that complemented the creaminess of the soup. It definitely hit the spot on a cold, rainy day.

Creamy Roasted Parsnip Soup


Ingredients:
3 large parsnips, peeled, cut into large chunks w/ centers removed
1/4 red onion, peeled coarsely chopped
1-2 shallots, peeled, coarsely chopped
2 stalks celery, coarsely chopped
4 medium potatoes, peeled, cut into large chunks
1 Tbsp Olive Oil
3 cups broth (veggie or chicken)
.5 cup 2% milk
1 Tbsp heavy cream
1/2 Tbsp butter
Salt & pepper to taste
Toasted hazelnuts, coarsely chopped

Directions:
Preheat the oven to 400 degrees. Combine the parsnips, onion, shallots, celery and potatoes in a dutch oven. Mix in the olive oil and salt. Cover the dutch oven and place it in the warm oven for about 30 minutes. Once the veggies are soft, remove the pot from the oven. Cover the veggies with broth and cook over medium heat on the stove top. When the broth is warm, blend the soup with a hand blender, or in a regular blender (working in batches). Once the soup is smooth, add the milk, cream and butter. Mix well and return the soup to medium heat. Add pepper to taste. Serve with toasted hazelnuts if desired.

Beef Chili with Anasazi Beans


You might remember from my post about berry-picking that I bought several pounds of dried beans at the Phipps Country Store over the summer. By now, I’ve used up most of those beans, minus a pound or so of soybeans, and a pound of anasazi beans. I’ve read that you’re not supposed to wait too long before using dried beans, or else they start to get wrinkly and tough. So I decided that I would use the anasazi beans to make some chili. I also happened to have a pound and a half of leftover grassfed beef roast, which I purchased from Paicines Ranch (located a little ways south of Hollister). With these two ingredients in mind, I looked for a chili recipe online, and happened upon a tasty-looking one from the Bob’s Red Mill website. The recipe was a perfect fit because it called for both anasazi beans AND cooked beef roast. What luck!

I ended up adapting the recipe a little bit, and it turned out delicious! It had just the right amount of kick, and a nice texture from the corn kernels, beans and meat. We served it with a slice of cornbread, topped with a little butter and honey, making for a very classic southwestern dish.

Ingredients:

1 lb. Anasazi beans
Canola oil spray
1 large onion (chopped)
4 cloves garlic (chopped)
1 green bell pepper (chopped)
2- 14 oz. cans diced tomatoes
3 cups water
1 bay leaf
1/2 tsp. cayenne pepper
2 tsp. ground cumin
3 Tbsp. chili powder
1 tsp. oregano
1 tsp salt
3 Tbsp. butter (softened)
3 Tbsp. instant flour (such as Wondra- regular flour will do too)
1-1/2 lb. cooked beef roast (diced)
2 cups corn kernels (frozen)

Details:

  1. Sort through the dried beans to remove any shriveled beans or pebbles. Rinse beans and place in a large pot. Cover with water, and bring to a boil. As soon as the water starts boiling, turn off the heat and let the beans soak for 5-8 hours.
  2. After soaking the beans, drain the water, and cover the beans with new water. Bring to a boil and allow to simmer for 45 minutes, or until the beans are soft but retain their shape. Do not add salt during this step. Salt will harden the bean skin, which in turn wont allow the bean to cook as thoroughly.
  3. While the beans are cooking, spray a large stockpot with oil and saute the onion and green bell pepper for about 3 minutes. Add the chopped garlic and saute for another minute. Next add the bay leaf and all other spices, including salt. After coating the vegetables with spices, add the water and tomatoes. No need to drain any tomato juice from the diced tomatoes, just dump the contents of the can into the stockpot. Bring to a boil on medium-high heat, and then reduce heat to simmer for 15 – 20 minutes.
  4. In a small saucepan, warm the butter over medium heat. Once melted, slowly begin incorporating the instant flour using a wooden spoon. You should obtain a smooth paste. Add this to the stockpot and stir well.
  5. Add the beef and frozen corn kernels to the stockpot. Simmer for another 5 minutes. Then add about 4 cups of cooked beans (depending on your preference) to the stockpot and cook for 5 more minutes. Save the rest of the beans for another use (they’re great on quesadillas, in chicken tacos, tossed into any old vegetable soup…etc…).
  6. Serve the chili with some shredded cheese and a slice of cornbread.

Makes 10 large servings.

Creamy Cauliflower Soup


Cauliflower seems to be a fairly controversial vegetable in the world of produce. Some people love it while others hate it. I am personally on the “love it” side of the fence. But I’m usually something of a “veggie advocate,” insisting that if someone doesn’t like a particular vegetable, it must be because they haven’t yet experienced the full potential of it. Take my dad, for example. For years, he thought he hated eggplant. I believe he didn’t like the spongy texture of those giant aubergines. That was until he tried a well-prepared (and significantly less spongy) Japanese eggplant. Now he loves the stuff and I’ve actually heard him make special eggplant requests. Now that he has experienced eggplant to its full potential, he has a new appreciation for it.

Anyway…all that to say that, if you don’t think you like cauliflower, maybe you do and you just don’t know if yet. And I mean really, how can it taste bad when it’s cooked into a smooth soup with a little cream, broth and nutmeg? You know you want some.

Ingredients:

1 head cauliflower
3-4 small potatoes
2 cloves garlic (minced)
2 tsp. olive oil
4 cups broth (vegetable or chicken)
2 cups water
2 Tbsp. cream
salt and pepper to taste
2 pinches of nutmeg
thyme springs (optional)

Method:

  1. Prepare the head of cauliflower by cutting the florets off the base and rinsing them in cold water. Peel the potatoes and cut them into 1-inch cubes.
  2. Heat the olive oil in a heavy bottom soup pot. Add the minced garlic and saute for about a minute. Add in the potatoes, and enough broth to cover the bottom of the pot (to keep the potatoes from sticking). After 2 minutes, add the rest of the broth and bring to a boil. Simmer the potatoes for 5 minutes.
  3. Add the cauliflower florets and water and bring the soup back to a simmer. Cook for about 15 minutes, or until the cauliflower and potatoes are very tender. At this point, remove the pot from heat.
  4. Using an immersion blender, blend the soup until it is very smooth. If you do not have access to an immersion blender, you can use a regular blender or food processor. Just make sure to work in small batches of soup (or else you might end up with a mess on your hands). Here are some pictures of the soup progression using an immersion blender.


5. Allow the mixture to cool for 10-15 minutes. Add the cream, salt, pepper and nutmeg. Heat the soup back up just before serving. Garnish with thyme sprigs if desired.

Kabocha Squash & Beer Soup


A little while back, we received a nice-looking Kabocha squash in our CSA box. If you’ve never had one of these hardy winter squashes before, you’re missing out! They look like a green, kind of ugly pumpkin on the outside. But when you cut it open, you get a smooth orange flesh that’s delicious when roasted, steamed, or cut into cubes and boiled. You can find them at most farmer’s markets or natural grocery stores during the late fall and winter seasons. My preferred preparation method is to cut the squash in half, place it open side down on a cookie sheet and bake it at 400 degrees for about 40 minutes. Once the kabocha is cool enough to handle, scoop out the flesh with a spoon. You should get something like this:


I usually like to make soups with kabochas, because they have such a smooth flesh. Once roasted, the squash blends down to a bisque-like consistency, without the extra calories from heavy cream. With this particular soup, I decided to try something different- hence the beer component. My official taste tester called it, “the best kabocha squash soup I’ve ever had,” so I guess you could call that a “hit.”

Ingredients:

1 medium-sized kabocha squash
4 cups chicken broth (can substitute with veggie broth)
1/2 cup beer
1 tsp. ground cumin
leaves from 5-6 sprigs fresh thyme
salt and white pepper to taste
a few dollops of fromage blanc (can substitute with greek yogurt or sour cream)

Details:

  1. Preheat the oven to 400 degrees. Cover a cookie sheet with aluminum foil, or a silicone mat. Cut the kabocha squash in half, scoop out seeds, and place (open-side down) on the prepared cookie sheet. Bake for about 40 minutes, or until the squash can easily be pierced by the tip of a knife. Remove from the oven and allow to cool for 10-15 minutes.
  2. Scoop out flesh from squash into a soup pot. Cover the squash with the chicken broth and cook on medium heat for 5 minutes. Blend the squash mixture with a hand blender until it is very smooth. If you don’t have a hand blender, use a food processor or regular blender, working in batches.
  3. Return the kabocha squash to the pot and add thyme leaves. Mix in beer and cumin. Add salt and pepper to taste. Cook soup on medium heat for 5 more minutes.
  4. Serve soup with a dollop of fromage blanc and a slice of crusty rustic bread.

White Bean and Ham Soup


Recently in Northern California, we’ve had some pretty cold, sometimes rainy, sometimes foggy winter weather. Personally, I love it. I always look forward to the changing of the season, and especially to the culinary ramifications that come with it. By the time one season is ending, I’m usually looking forward to new produce and different types of dishes. In the summer, I always wait impatiently for the first sweet tomato, peach or strawberry. In the fall and winter, I enjoy squash and root vegetables. I especially love soups and stews on a cold day, and these tend to be a staple for us in the winter. So in honor of soups and cold weather, my next couple of posts will feature winter soups and stews. I hope you enjoy them as much as we do!

First on the list: White Bean and Ham Soup

1 lb navy beans (picked through and rinsed)
8-10 cups water
1 large onion (diced)
1 1/2 cups carrots (chopped)
1 yellow, orange or red bell pepper (chopped)
2 cups celery (chopped)
1 ham shank (about 1.5 lbs- ask the butcher to cut it in half, if possible)
1/2 andouille sausage (cut into bite-sized pieces)
4 cloves garlic (chopped)
1 pinch herbes to provence (substitute with dried thyme and rosemary if you don’t have these)
Salt and pepper (to taste)

1. Several hours before you begin cooking the soup, put your beans in a large pot and cover them with water. Let them soak until you’re ready to use them (at least 4 hours). I usually begin soaking the beans in the morning when I’m planning on making them for dinner. Once they’re soaked, drain the water and put them back in the large pot.
2. Cover the beans with the water and add the ham shank. Turn on the heat to medium-high and bring the water to a boil. Then reduce to medium heat and let simmer for about an hour.
3. Remove the ham shank from the soup and add all of the vegetables. Once the ham shank is cool enough to touch, cut the meat off the shank, and chop it into bite-sized pieces. Put the ham pieces into the soup. Allow to cook for another hour.
4. About 15 minutes before serving, add the andouille sausage, herbes the provence and salt and pepper.

Serve and enjoy!